
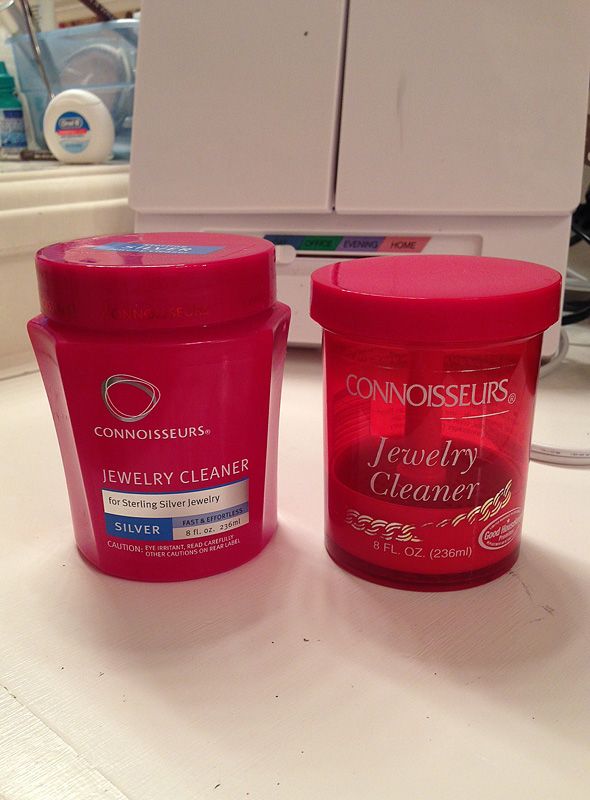
I opened up the silver cleaner the other day & gagged. The odor is horribly intense & there is a warning on the jar itself stating the solution is dangerous. I was pretty much over it. I sat down at the computer & did some googling on how to clean sterling silver naturally. I'm not linking back to any one site because I went to numerous sites & basically, they all say the same thing. So I pulled out the ingredients & got busy.
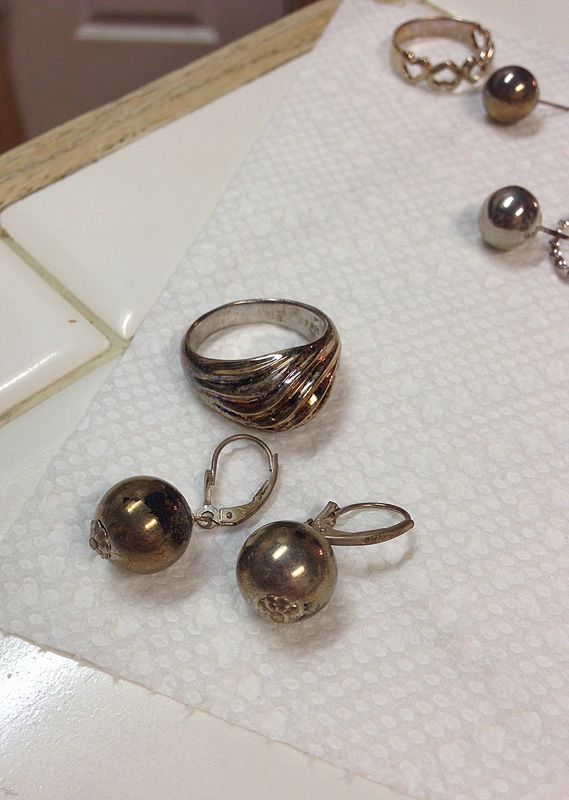
A friend warned me that she tried this experiment with her silver jewelry & it ruined her pieces. The difference is, her recipe (she got off Pinterest) called for vinegar. Not one of the recipes I found called for vinegar, so that may have been her problem (some of them did call for salt, but I didn't use that, either). None the less, I chose 3 very old, very tarnished pieces to start with, just in case they, too, ruined. The earrings I don't think I have ever worn. My ears are too fat (now you know by now I have a 'fat ear' problem, which is why I have so many piercings), so they've just been thrown in my jewelry collection for 15+ years. The ring I've worn a few times, but not many. No biggie if any of these got ruined.
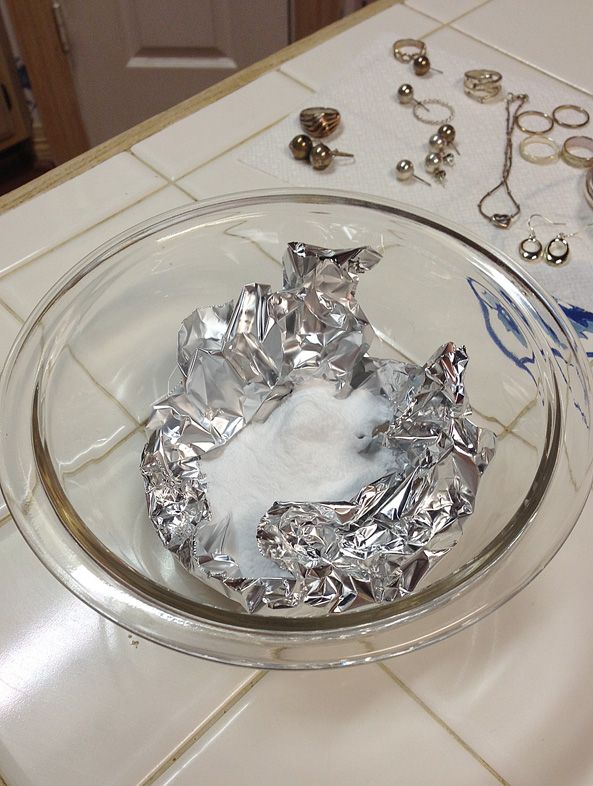
Here are the supplies you need:
Baking Soda
Foil
Hot, hot water
Bowl or pot
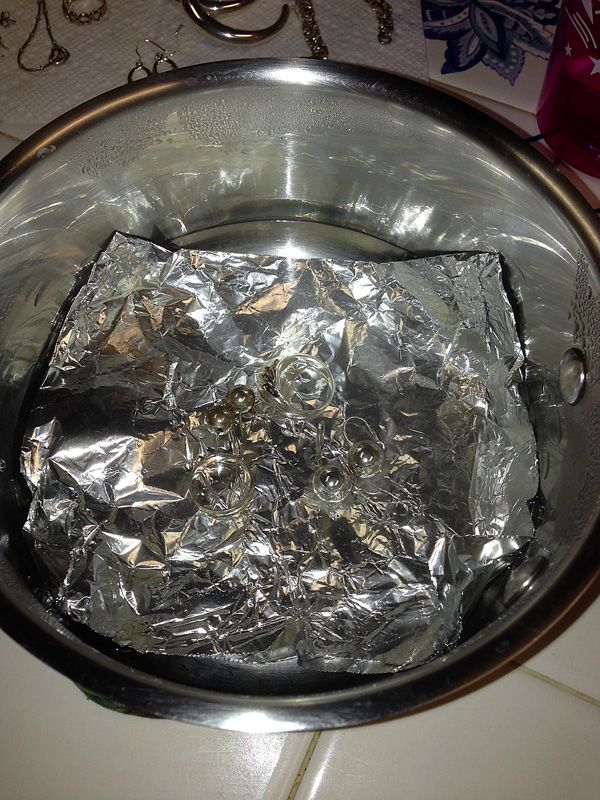
The first procedure I tried called for a bowl, with "wadded up" foil in it, & then 1 or 2 tblsp. baking soda.
Place jewelry in bowl & then add very hot water. Within minutes, bubbles begin to form on the tarnished pieces. The aluminum with the baking soda acts as a magnet to remove/reverse tarnish.
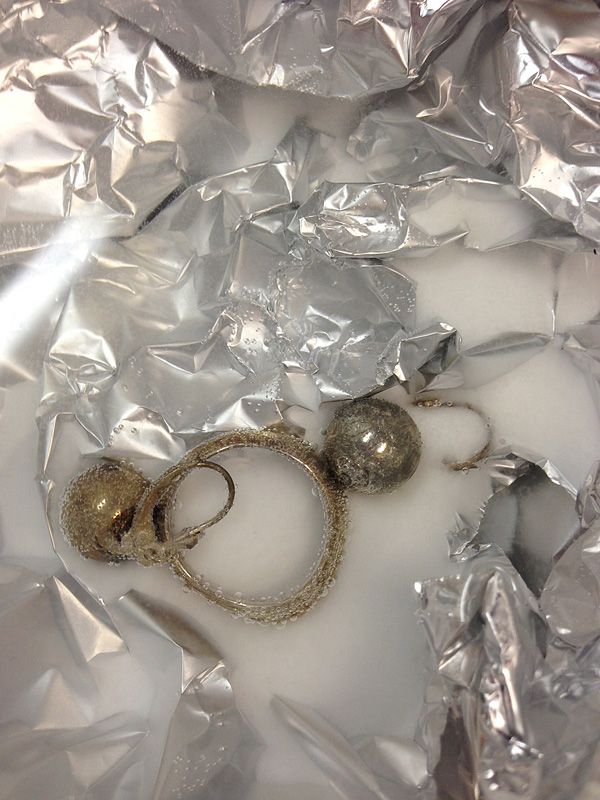
Was pretty cool, actually!
As you can see, my pieces were really tarnished & the procedure was taking quite some time, so I went back & read some of the other sites. Most of them mentioned placing the jewelry directly on the foil (vs. on the baking soda), so I changed procedures.
I got a pot, put enough water in it to cover my jewelry & let it boil. I then removed it from the heat. I put a piece of foil in it & tossed my pieces in. At this point, I threw in 2 more earrings & a ring, just for fun.
Then, I sprinkled on baking soda. I didn't really measure, I just kept sprinkling until I thought there was an adequate amount.
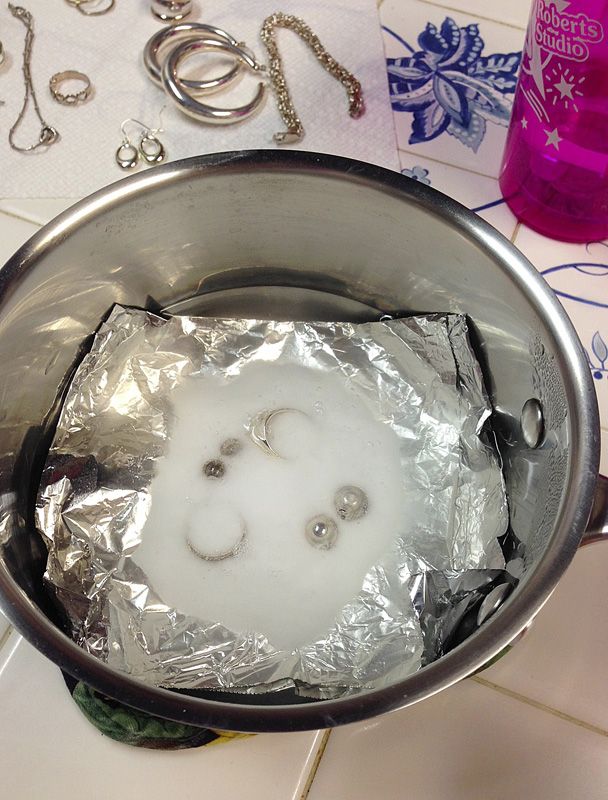
You can see how good they are looking - by this time (maybe 20 minutes?), the tarnish was really coming off!
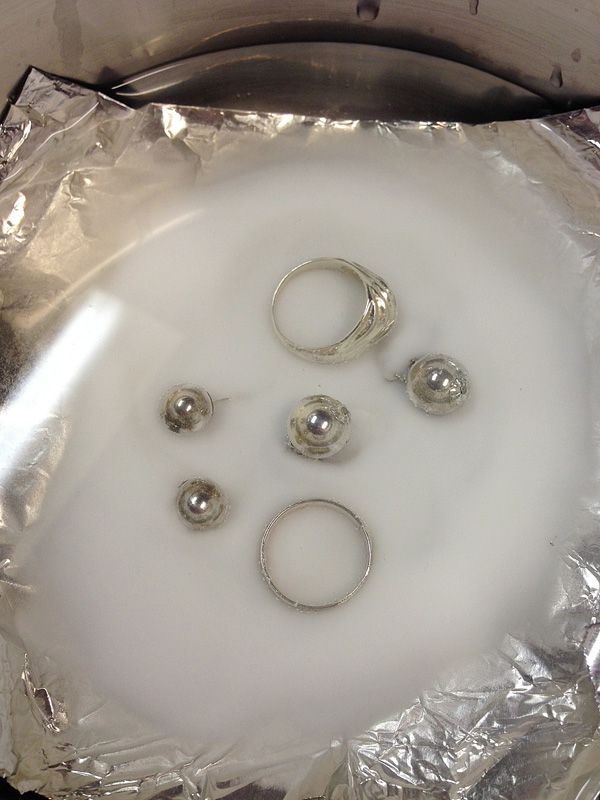
Because my pieces were in such bad shape, I just let them sit in the mixture. I even put my hand in a few times & swished them around & then let them sit longer. I didn't time how long it took, as I was playing games with my kids while the pieces sat, but I'm guessing about 40 minutes total. Obviously, the longer they sat, the more untarnished they became. When I thought they were done, I pulled them out!
They look pretty darn good! I then washed them off with soap & water & dried them with a towel.

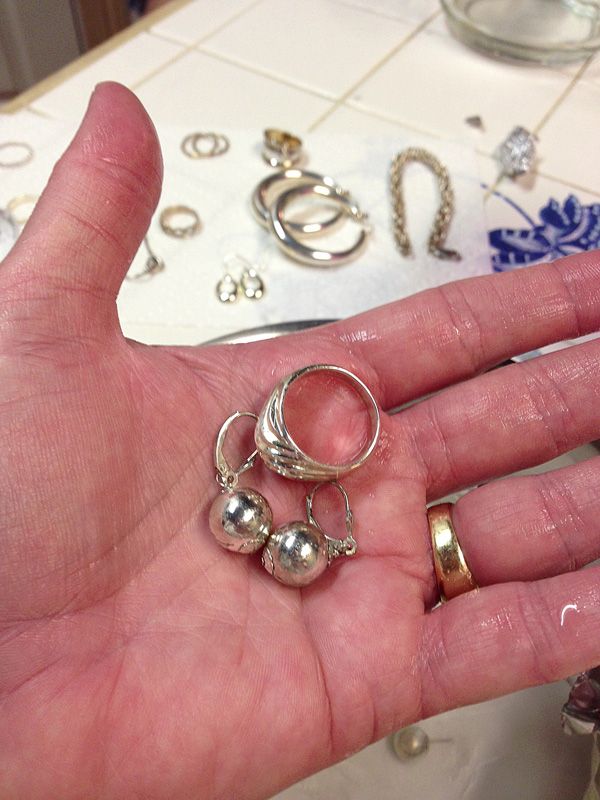
I was having a hard time getting a good, lighted photo, that really showed how revived & new they look! This is as good as I could get & I think they look fantastic!! They're so pretty again!
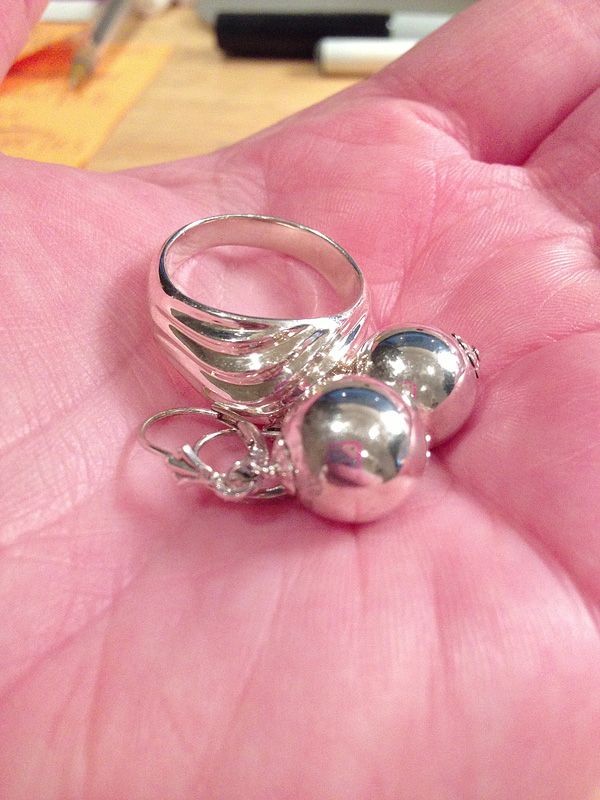
Out with my toxic jewelry cleaners! I'll use this simple, inexpensive procedure from now on. No more icky, harmful chemicals! I don't really think it matters which procedure you use, but I think the boiling water might work a tad faster. And, placing the pieces on the foil & then adding baking soda. I think it's more the ingredients that make it successful versus the technique. And of course, depending on the condition of your pieces, the less tarnished = the less time it will take.
Happy silvering!
Be sure to follow me on Facebook for more fun stuff! Click here!!
Linking up with: Not Just A Housewife, Home Stories A to Z, Under the Table and Dreaming, Alderberry Hill, Uncommon Designs, HuckleberryLove, Chic on a Shoestring Decorating, House of Hepworths, The Shabby Nest, Between Naps on the Porch, A Bowl Full of Lemons, House of Rose, Mary Organizes


17 comments:
That's awesome!! I'm going to give it a try on some of my cheap pieces for using it on my good stuff. LOL
I have heard of this method for silver pots and such but I never thought of this for sterling silver. I think this post just ended my aversion to buying sterling silver jewelry. Thanks!
I found you via Not Just a Housewife linky.
Angela
I tried this technique on my tea service and it totally works! Your jewelry is gorgeous! Thanks for sharing with us at Monday Funday!
Take care,
Trish
Wonderful tutorial! I loved the outcome!
Great post!! I included it in my post Βόλτα στη Γειτονιά #22 :)
Have a great week!!
Oh wow, Melissa! That is great! I am going to have to try this soon!! Pinned for later. Julia
Love this idea. I am pinning it to try out later! Thanks for sharing.
this worked amazing! i didn't even realize that some of my charms were tarnished until they shone so beautifully after this procedure. so easy to do!
This worked great - thanks for the tip! Just a note to be careful with opals - I had one that ended up cloudy looking after the baking soda bath.
So, this is working but smells really bad! Any chance these fumes are harmful?
It's baking soda and water. It's far from harmful or toxic.
Hi, I just used this process for 4 pieces of my tarnished sterling silver jewelry, and it works wonders! My pieces look great like your photos show! Thank you so much for this information. I did it with the hot water poured over the jewelry first, then I sprinkled the baking soda over it. I let it sit for about 5 minutes, pulled out of the solution, rubbed it with a dry cloth, and VIOLA!
Why oh why didn't anyone tell me this a L O N G time ago! It worked perfectly!! I am SO excited to wear my "new" old jewelry. :)
I would wonder about old pieces with "glued on" stones or other adornments coming off in the hot water.. E6000 might be good to put them back on. Stones that are "set" shouldn't be an issue. Sure looks like it saves time vs. using the old silver cloth! Thanks for sharing.
What about gold? Does it work on that jewelry too? Thanks
Did your tea service appear chalky afterwards? My silver plate silverware came out with a haze over everything and I had to buff A LOT to get it shiney.
Not good for some gemstones and pearls
Not good for some gemstones and pearls
Post a Comment