Showing posts with label Foodie.. Show all posts

Thursday, March 19, 2015

Hubby's Tator Tot Casserole.

Typically on Sunday evenings, my husband cooks dinner. He's really a better cook than I am (ahem) & much more adventurous. He decided to come up with his own Tator Tot Casserole & it turned out great!


Ingredients:

2 lbs. ground beef
1 - onion (hubby used used white)
1 - red bell pepper
1 - green bell pepper
1-2 cups of sharp shredded cheese (we shred our own - always - so much better!)
1 - bag frozen tator tots
Salt, pepper, garlic salt, chili powder
Plain greek yogurt

Brown ground beef with seasonings. While meat is cooking, chop onion & bell peppers. He didn't measure how much veggies - he just chopped up enough for our taste, probably about one cup+ each. In a separate skillet, pour a bit of the beef 'broth' in skillet & sauté veggies until soft. (I probably would have used olive oil or real butter vs. 'broth'.)

In a 9x13 dish, add meat. Sprinkle shredded cheese on top of meat. Add onion & peppers on top of cheese. Top with tator tots & then remaining cheese. Bake at 400 for about 30 minutes.


Quick, simple & delish! Even our kids gobbled it right up!

Not the healthiest recipe, but hey, better than fast food, right? I call that #winning!

Love when he cooks & I get a break. Thanks, hubby! :)

Tuesday, August 12, 2014

Mexican Chicken. Mmmmm.

Yum! Quick, easy & dinner is done! This is not my recipe - I altered Bonnie's recipe to fit our tastes. Thanks, Bonnie! (Btw, since I no longer sell Shaklee, be sure to order your Shaklee products from her! Link is on her site.)

Ingredients:

Chicken breasts (that's the only type of chicken we really eat)
Sliced onion
Onion flakes
Garlic Salt
Celtic Salt
Pepper
1 can Rotel
1 can black beans - drained/rinsed
1 can corn - drained
Sharp shredded cheddar (or mexican shredded)
Plain Greek yogurt (we use this for everything! In place of sour cream)
Add whatever else your family desires - make it your own!
Bake at 425 for about an hour. I check mine often, to make sure the chicken is not overcooked. Don't like rubbery chicken.

**********

Place chicken & seasonings on bottom.


Add beans, corn & rotel. Slide on in oven.


Pull out periodically to stir & blend flavors.


Once the chicken is cooked, remove from oven & top with cheese. Cover with foil & let sit for a bit.


Mmmmmmm!


We top ours with Greek yogurt. Next time, I will drain the rotel & add a bit of taco seasoning for more flavor. We like a bit of a kick.


Healthy & delicious. Enjoy! :)

Saturday, May 10, 2014

How I keep my lettuce fresh for days!

This is sooooo simple. I wish I had known this years ago. I love dark green lettuce, leaf lettuce being my favorite. When it's on sale, I stock up! I got all of this for $2.00. Even with making a huge, taco salad this week, there's so much remaining. But as of today, it's still crisp! I had a tuna wrap with it yesterday & we be eating more of it today.

Salad spinners are for the birds, in my opinion. I bought one & used it once. With all the emptying of the water, using such small amounts in the bucket, spinning & respinning, rinse & repeat - forget that! I can wash the lettuce & dry it faster that using that darn thing.

This is what I do to keep my lettuce yummy & crisp:

First, I lay it on a cutting board & cut off the stalk. Then, I wash it all. All of it. Under cold water. After, I put several pieces in my hand & 'shake' them in the sink, to help release some of the water. I then spread it out on towels or paper towels.


Then the monotony starts, especially when washing so much lettuce at once. I take dry paper towels, stretch out the leaves, & start patting. And patting & patting & patting. They don't have to be perfectly dry, but they need to be mostly dry.

Once that is complete, I start packing. In the beginning, I used zip lock baggies, then switched to produce bags (as seen in the photo), but discovered they are too thin & rip easily, so I'm back to zip lock baggies. They work awesome.


In the baggie, layer a paper towel, leaves of lettuce, paper towel, leaves of lettuce, paper towel. Zip it up & it will stay fresh, dry & crisp for a week or longer! Fresh, clean & ready to go. (If I have less lettuce, I only use one, or two at the most, paper towels.)

Happy leafing!

Follow me on Facebook for more fun stuff! Click here! :)

Friday, May 9, 2014

I'm low-carbin'!


Today is day 5 for me! I love this. It's a little challenging & I'm still searching for new recipes. Haven't really made a 'low-carb' particular recipe yet, but I will! I crave no bread, no rice, no potatoes (which is surprising, because truly, I'm a carb junkie. I cut sugar, too. I'm hoping by tomorrow I'm down 6-7 lbs. If you are wondering, I am taking no supplements/vitamins/anything pertaining to low-carb or weight loss. I'm doing it solely with food alone & my Shaklee 180 protein smoothees. I got this. :)

Here are two great low-carb sites I found:

alldayidreamaboutfood.com

&

holisticallyengineered.com


Follow me on Facebook to follow along & for more fun stuff! Click here!

Happy Friday!

Monday, May 5, 2014

Taco Salad with Greek Yogurt.


This is so delish! Even my kids love it. I add crushed tortilla chips to theirs, but omit from mine. Recipe is so simple!

Ingredients:

1.5 lb. or so ground beef.
Chopped onion (to taste - I use about a cup).
Chopped garlic (to taste - I use just a few cloves).
1/3 cup water.
Homemade taco seasoning (to taste - I add about 2 tbsp.) Recipe here.
1 can black beans (rinsed).
1 can corn (rinsed).
Lettuce - I prefer leaf lettuce.
Shredded cheese.
Plain greek yogurt.
Dressing of choice: salsa/ranch/italian.
Tortilla chips.

Cook beef with onions/garlic. Add 1/3 cup water & homemade taco seasoning. Mix. Add black beans & corn & let flavors blend for a bit. Toss on top of leaf lettuce, add salsa/ranch/whatever dressing, add shredded cheese, top with tortillas (I omit them from mine for low-carb) & greek yogurt.

MMMMMM! My entire family gobbles it! This will become a staple here in our home.

Enjoy!

Follow me on Facebook for more fun stuff! Click here!

Wednesday, March 5, 2014

Homemade Alfredo sauce!

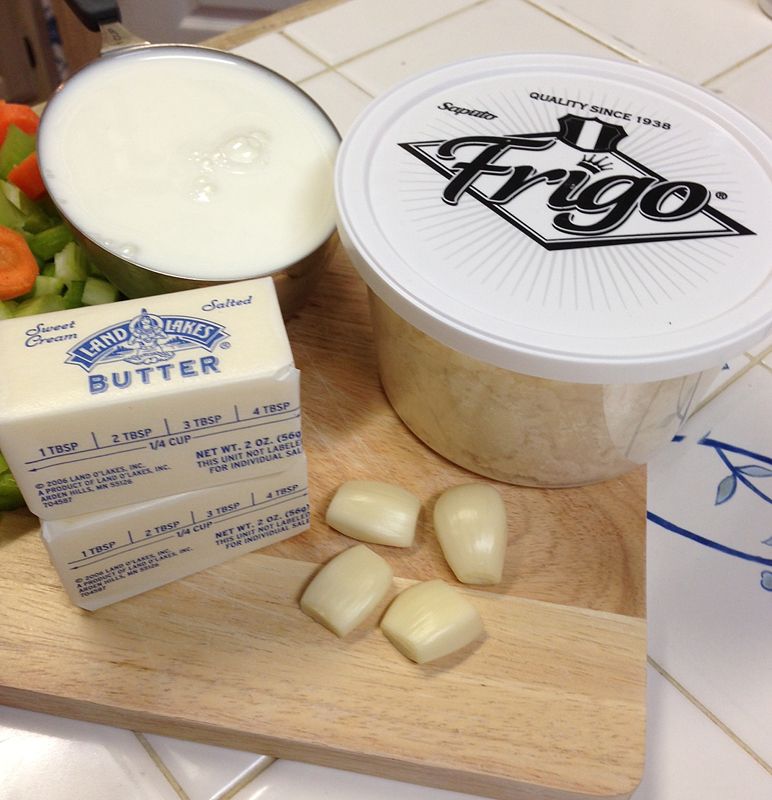
My oldest son loves Alfredo sauce, so I told him I would try to find a recipe & make it for him. When I searched the internet for recipes, none of them appealed to me. Many of them contained cream cheese! In Alfredo sauce? No thanks. I just happened to have Frigo Parmesan Cheese (shaved), so I looked on the package & low & behold there was an Alfredo recipe. Considering I couldn't find any others, I decided to give it a try.


The recipe was so easy. I followed the directions exactly - the only thing I did different, is add 4 cloves of minced garlic (& I omitted the parsley - ew). Garlic is so healthy & the majority of us love it, so I added a bunch. Mmmmm. I love the smell of fresh garlic.


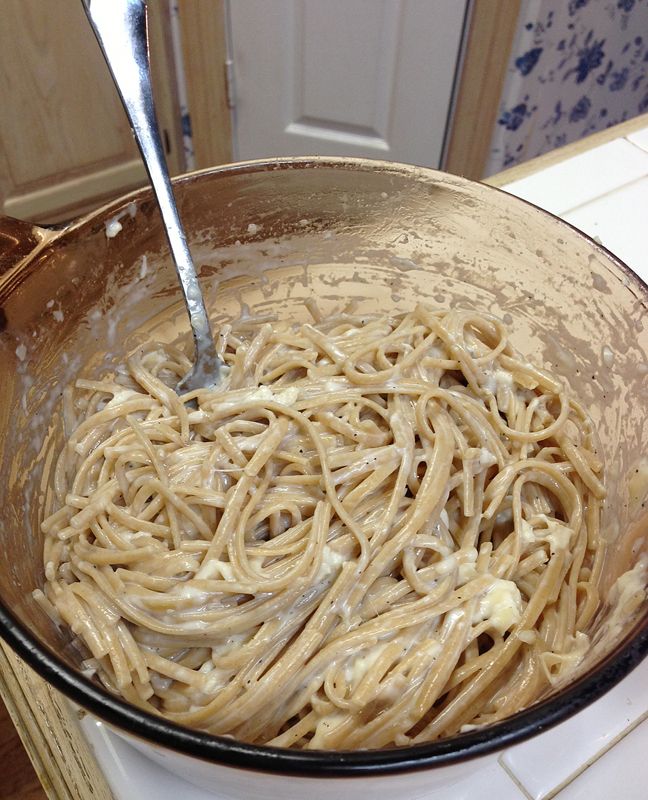
I pulled it off the burner to show you what it looked like while I was mixing the ingredients. It was quite a chore mixing all these. My arms got a good workout. (We only eat Whole Wheat pasta.)


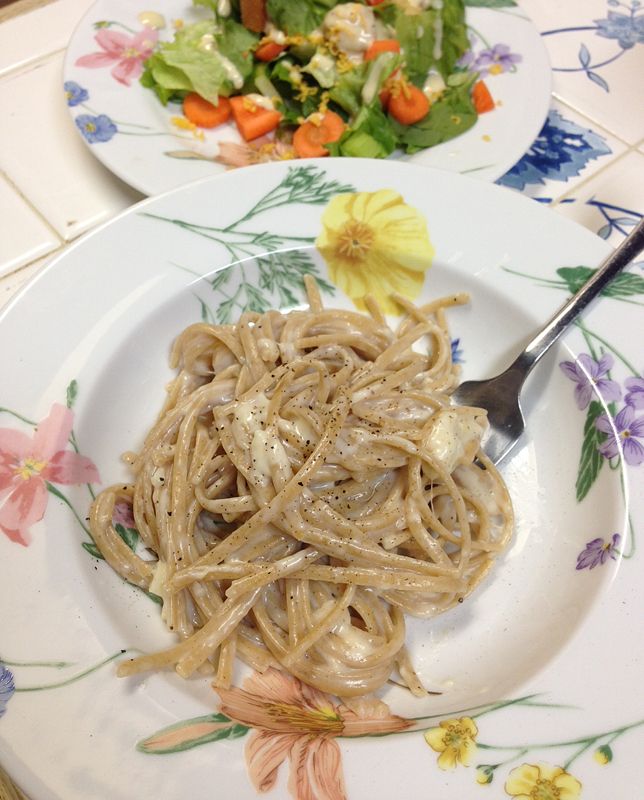
You can visibly see the shaved parmesan - it did not get completely melted (which, trust, mattered none…it was ooey gooey good). Next time, I will make the sauce separately & then add it to the pasta. Melting it first is probably much easier & will make it simpler to mix with the pasta. In addition, I will use shredded, vs. shaved, parmesan. Shredded parmesan will probably melt quicker than the chunky shaved.


It was soooo good & bonus! All 4 of my children loved it! :)

Monday, February 3, 2014

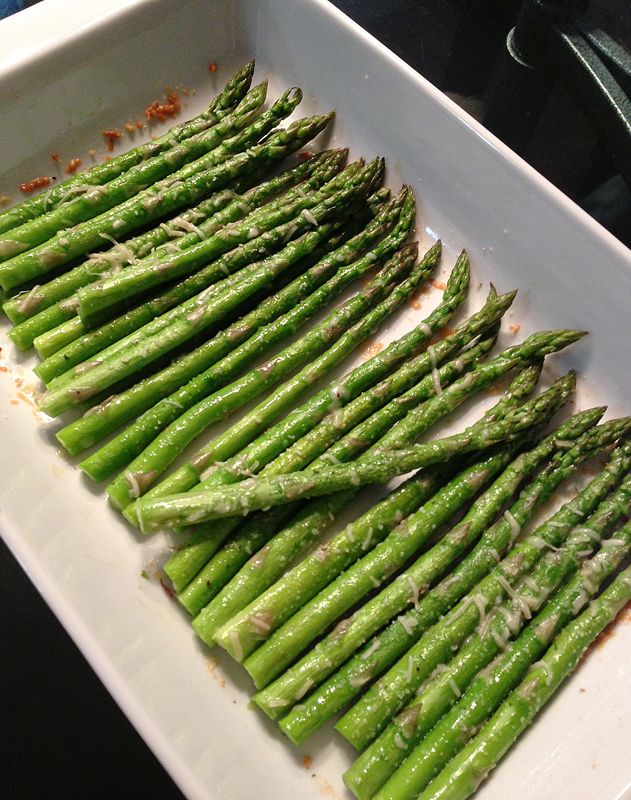
Mmmmmm baked asparagus!

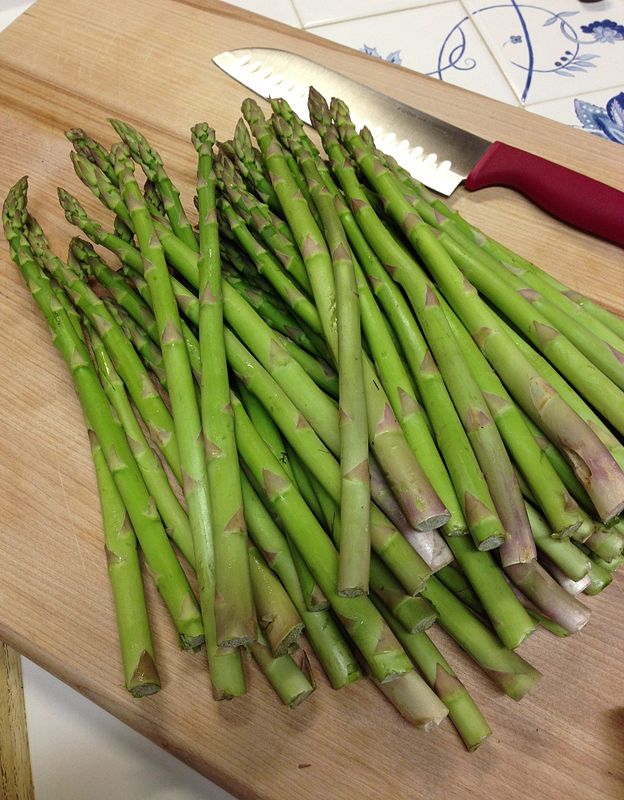
I didn't used to like asparagus. Now, I love asparagus. This recipe is so darn simple to make & it melts in your mouth! Here's how I make mine.

2 lbs. fresh asparagus (make sure the stalks are not limp - you want firm stalks with firm, closed tips)
Olive Oil
Sea Salt & Pepper
(Tonight, I threw on just a bit of Garlic Salt, just for added flavor)
Shredded Parmesan or Mozzarella Cheese - either works fine.

Always cut or snap off the bottom of the stalks. They're very tough & ruin the dish - so always trash the ends. I usually cut off an inch or two. I think it's quicker to cut them, so I line them up & whack a group of them at a time. Then, wash & dry. I lay mine out on a kitchen towel to dry, as to not waste a whole bunch of paper towels. They dry in about 10 minutes. You can roll them around on the towel if there's any moisture remaining when you are ready to cook them.


Lay them in your baking dish (I typically use porcelain), in a single row, making sure they aren't stacked on top of each other. This will ensure they're all cooked evenly. Drizzle with just a bit of olive oil - start with just a tad - you can always add more. Roll them around to coat. Sprinkle with salt, pepper & garlic salt. Top with a light layer of cheese. I used to add a bunch of cheese, then realized I was defeating the purpose of them being healthy. Ha! So now I just add a bit.

Bake at 350 or so for about 10 minutes. Keep on eye on them so they don't wilt & overcook (they'll look all puny if they overcook). I cook them until there's just a bit of crunch & pull them out. If they're too firm, they won't be any good. I usually test one to make sure they are done before removing them from the oven. You want them soft, with just a bit of crunch.


They turn a beautiful, bright green & they are soooooooo good! Totally addicting. I could eat these for my meal alone.

I'd better start buying 3 lbs.

Tuesday, January 7, 2014

Mexican Quinoa & homemade garlic bread.

What to do for dinner? The holidays are over & I have yet to get to the store to restock. Being it's so cold here & almost all of our smoke alarms malfunctioned during the night, I knew grocery shopping wasn't going to happen today. I'm also currently in the mindset, I ain't wasting nothin'. I'm about saving money this year, not tossing it in the trash. Which, unfortunately, sometimes I did in the past.

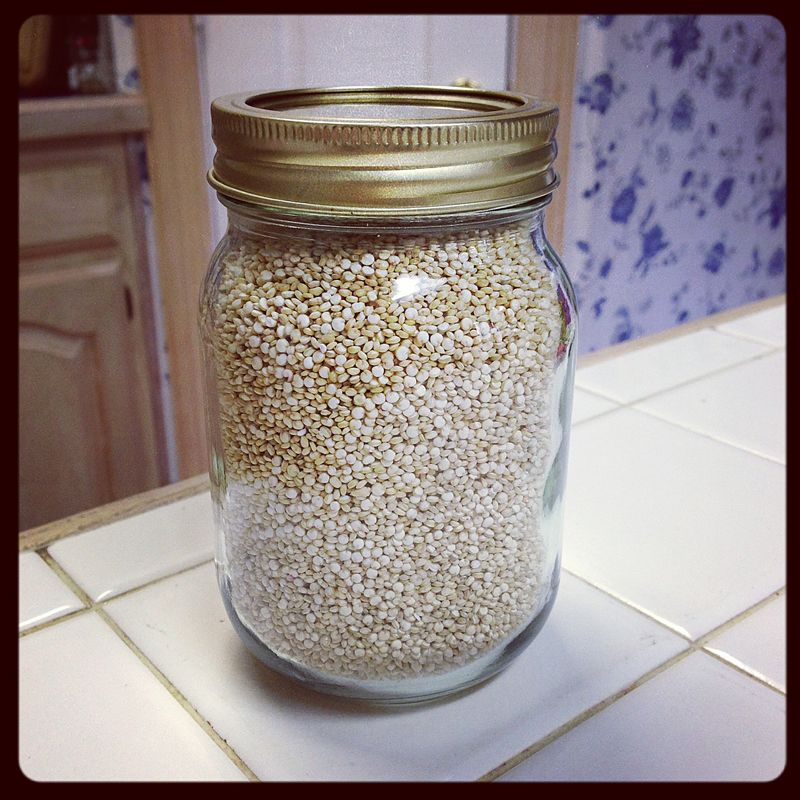
I knew I had 2 lbs. of hamburger meat. I knew I had a box of Quinoa, which I plan on incorporating into a lot more of our meals. Quinoa is so healthy! Do some googling. I had some onions that my husband had cut up a few nights ago, & I had some celery stalks that had gotten lost amongst frig items. Using those 4 ingredients, I sat down & googled. And found this recipe.


I dug in the pantry & found a can of diced tomatoes (that's luck - I don't buy them - my husband must have). When reading the recipe, I also read the comments. Some noted the recipe was good, but bland, & that they added taco seasoning. Great! But I didn't have any taco seasoning. I was searching for a homemade recipe, when one of my Shaklee partners led me to this recipe. Fortunately, I had all the ingredients! But one. I made it anyway! I was very leery about homemade taco seasoning but I have to say - it tasted great! Will use it from now on.

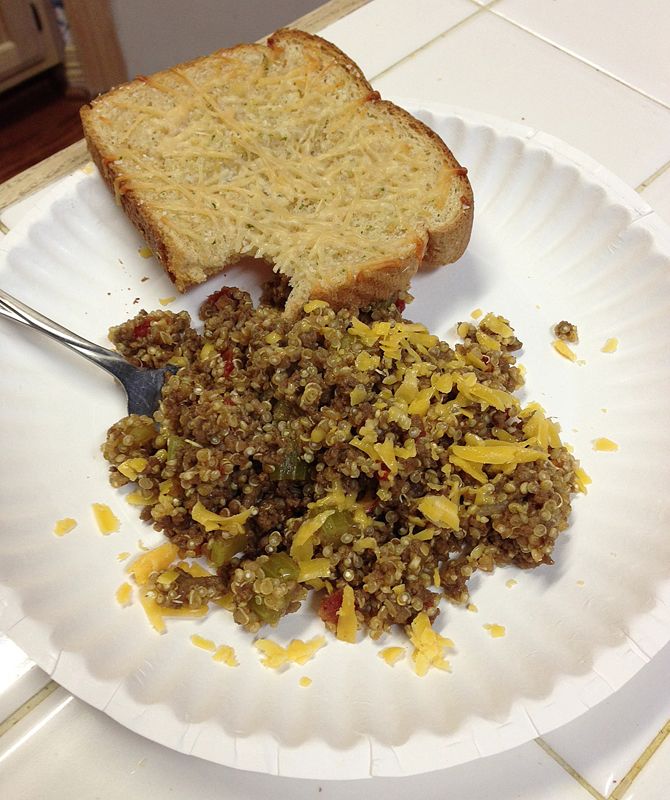
Here are the ingredients I used for my Mexican Quonia:

2 lbs. ground beef.
chopped onion - I didn't have as much as I would have liked - probably 1 cup or less.
chopped celery - I didn't measure - just chopped some up & tossed it in. I'll include this every time - added a nice crunch.
(I browned the meat with the onion & celery, & also threw on some dried onions & garlic salt. Why not?)
1 can diced tomatoes - could have used 2 cans, but we aren't huge cooked tomato fans - so one was ample for us.
2 cups uncooked Quinoa (rinse it first, which I did).
1.5 cups water.
Taco seasoning - I didn't measure, but probably used about 2.5 tablespoons - next time I'll use just a tad less. It had a yummy kick!
Cooked uncovered, stirring frequently, until the Quinoa is done.

Topped with just a tiny bit of sharp shredded cheese (I shred my own now - no more preshredded!)
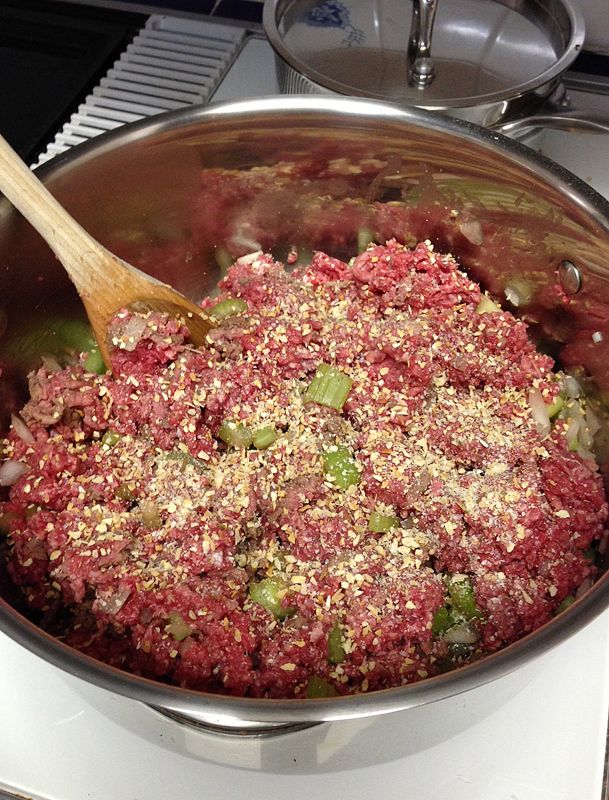


Recipe makes a ton & is very filling. Fed 5 (my youngest did not like it - no surprise there - other 3 kids loved it!) & have a lot left over. Next time, & there will be a next time, I'll add corn & beans & will probably top with a bit of sour cream. Really, you can change this recipe up any way you want. My husband thinks it would be great in a taco shell.

I decided to make some garlic bread to go with it. This is my sister's-in-law recipe that I've used for years. Sometimes I cheat & buy the frozen, but most of the time, I make this.

Bread.
Generous amount of butter (real butter!).
Light sprinkle of garlic salt (don't do too much!)
Top with parmesan.
350 degrees, top rack, for about 8 minutes or until cheese is melted.
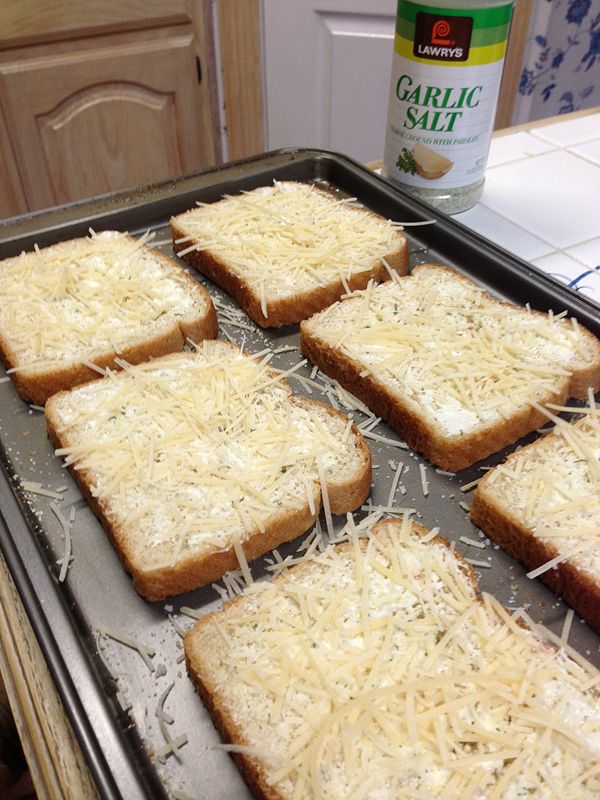


So good! I forgot to add a veggie with dinner. I'm a tad tired due to last night. We'll blame it on that. I did attempt grapes, but they didn't look too good. They, too, had gotten lost in the frig. So I tossed those. No one seemed to mind.


I better get to the store tomorrow.

Follow me on Facebook for more fun stuff! Click here!

Monday, December 9, 2013

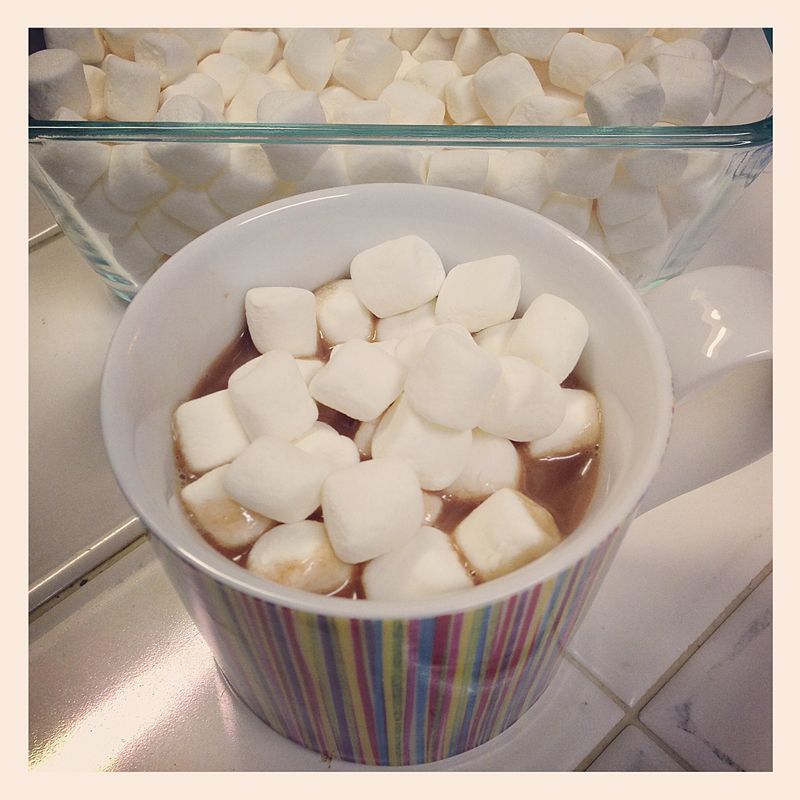
Homemade hot chocolate!

This is delish, people! Yum! Typically, I'm not really a hot chocolate fan. The box packages are just crap, the Hershey's Cocoa recipe is too rich for me & I am not fond of overly rich dishes/drinks. But when I found this crock pot homemade recipe (original here), I decided to try it, since my kids love hot chocolate. And can I just say - winning!


1.5 cups whipping cream
1 - 14 oz. can sweetened condensed milk
6 cups of milk
1 tsp. vanilla
2 cups of chocolate chips (milk chocolate or semi-sweet - semi-sweets are richer, so I always choose milk chocolate)

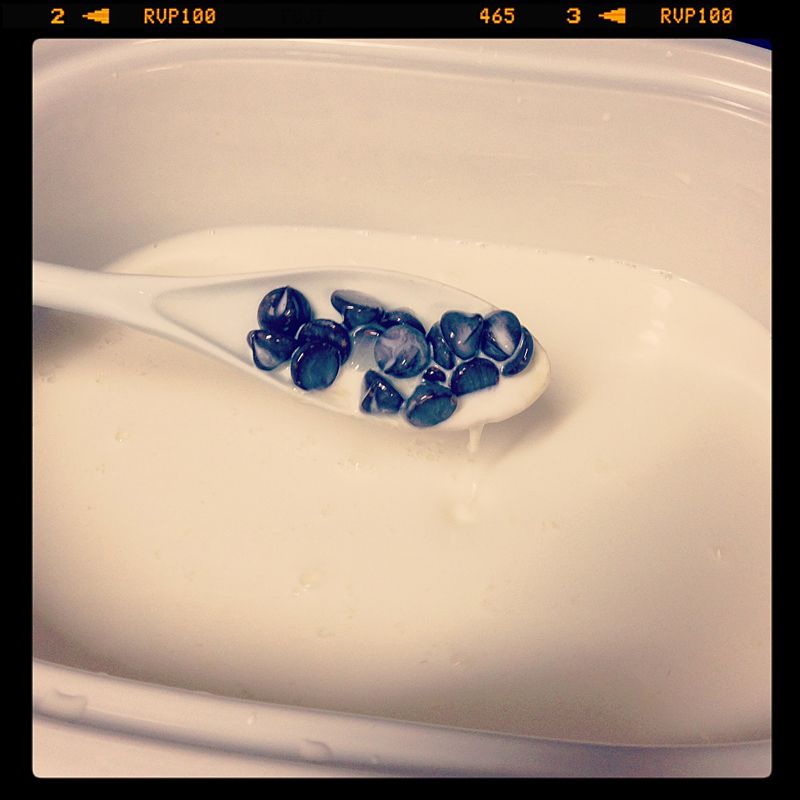
Stir together whipping cream, milks, vanilla & chocolate chips in crock pot.

Cover & cook on low about 2 hours, stirring occasionally, until mixture is hot & chocolate chips are melted. Stir again before serving. Garnish as desired.

When mine was finished, I switched my crock pot setting to 'warm'. When we were ready for our hot chocolate, it was just the right temperature, instead of having to blow, wait, blow, wait, rinse & repeat.

Also, I stuck the whole crock pot in the frig & when my kids are ready for some more tomorrow, I'll just stick that puppy right back in & warm it up!


Baby it's cold outside! Make some! :)

*Side note - my sister-in-law told me the original site (link above) has many awesome recipes! She made the hot chocolate, beef stew & bbq pork chops & said they all are amazing! I'll be checking into those!

Monday, July 8, 2013

How to lubricate a wooden cutting board!

I love wooden cutting boards. I've used them for the last 25 years. My brother owns his own cabinet business & made my cutting boards for me for many years. Now I just buy them at store. I do not like butcher block, Bamboo or plastic. Just the simple, wooden boards.

Wooden cutting boards must be lubricated to prevent splitting, cracking, drying & breaking. Kind of like our feet. :)

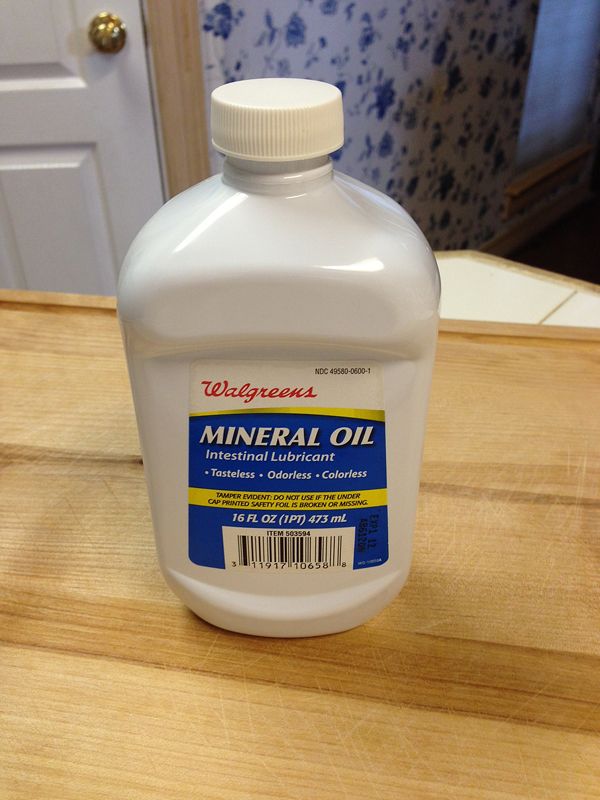
I use Mineral Oil to treat my board, because it's safe to ingest & doesn't develop an odor over time. I recommend not using vegetable, canola or like oils because they are apt to become rancid & stain. I used to use vegetable oil before switching to mineral. I have used mineral oil for several years now & I love it. I think it keeps the board lubricated longer. I also love how my board sheens after treated! Pretty is so important, you know. :)


Application can vary & really, you can use any technique you want. I use use paper towels. The mineral oil really saturates the paper towels, making application coat really well.

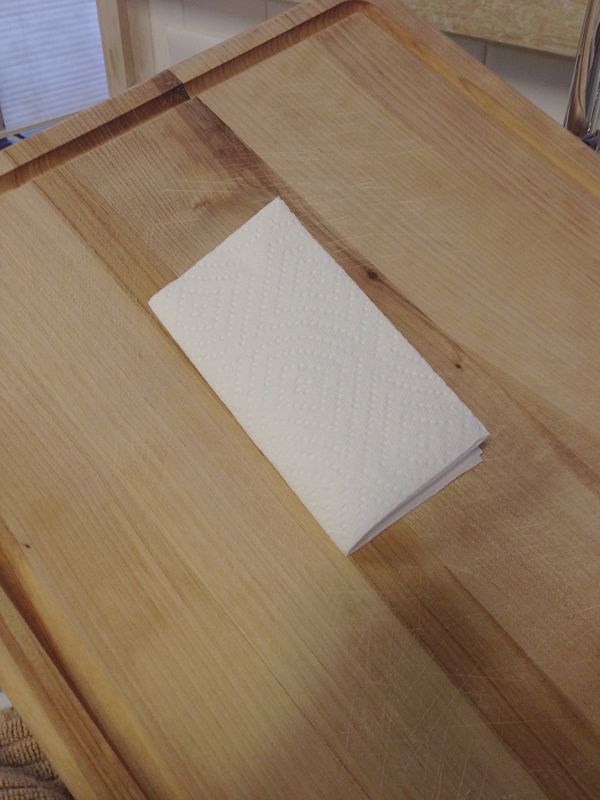
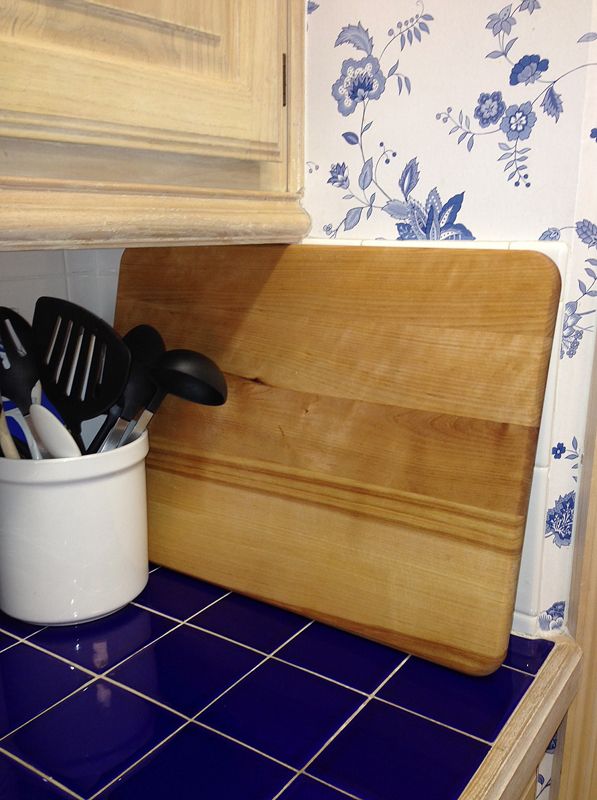
(The above photo was taken right before I lubricated my board. It was on my island, under the light. My board looks really dry in the two photos below because when I moved my board to the sink, I forgot to turn the sink light on. I turned the light on as soon as I noticed. It actually looked like the photo above - I keep my board lubricated at all times.)


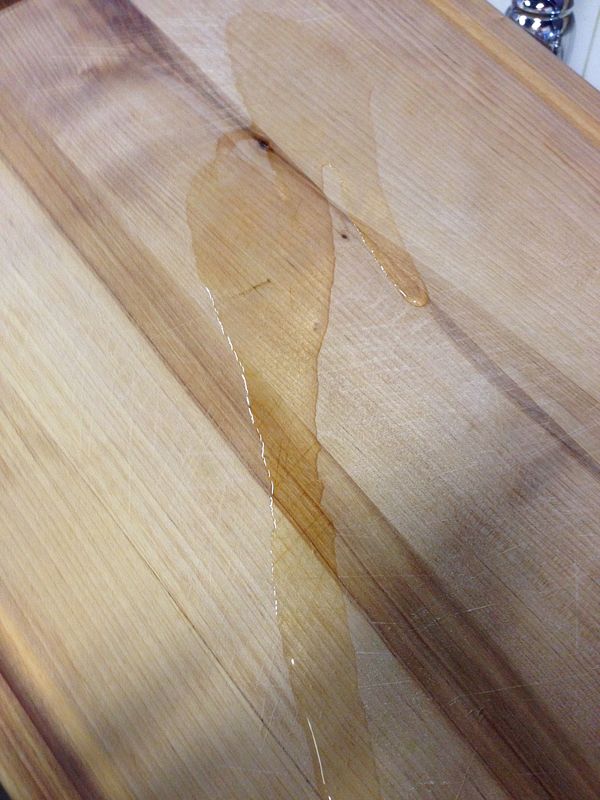
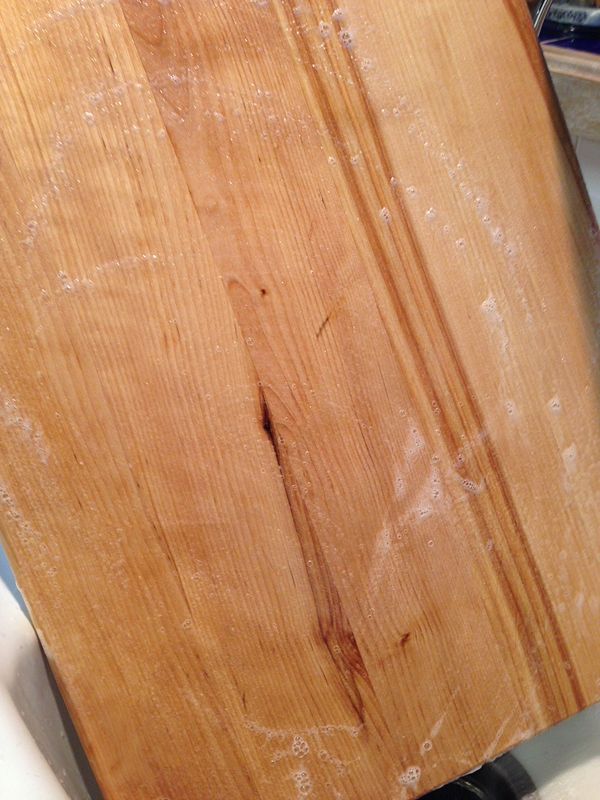
The first thing I do is pour a very generous amount of mineral oil onto my board. I like it good & thick for good coverage.


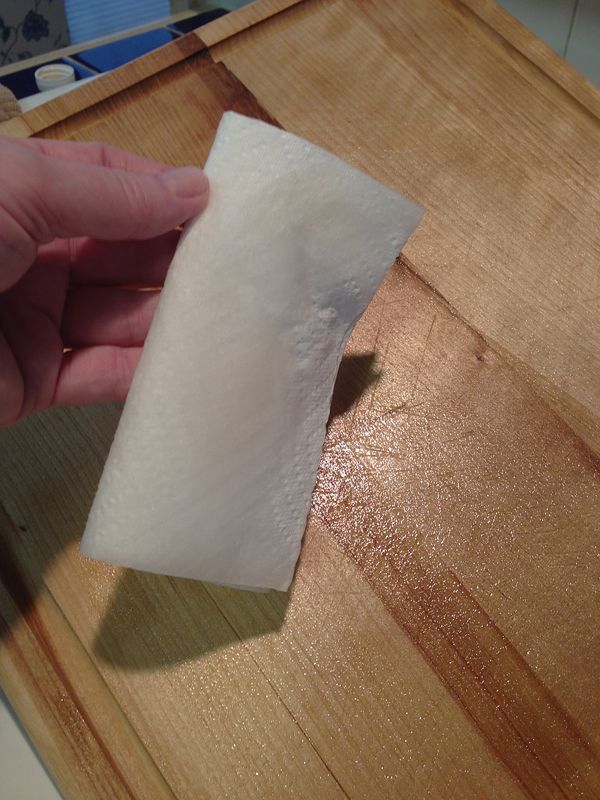
Then, I take my paper towel & just start rubbing & coating the board. (This task can get messy! Wear gloves if you deem necessary. After so long, the paper towel begins to disintegrate but it's ok, application still works & I wash off any paper towel residue when done.)


I make sure all areas are covered & because mineral oil is nice & shiny, I can see any areas that I missed. I even do the edges & sides of the board. When the front is done, I flip to the back & repeat.


After I'm done, I let it sit & absorb, for about 10 minutes or so. Then, I wash it with hot water & soap.


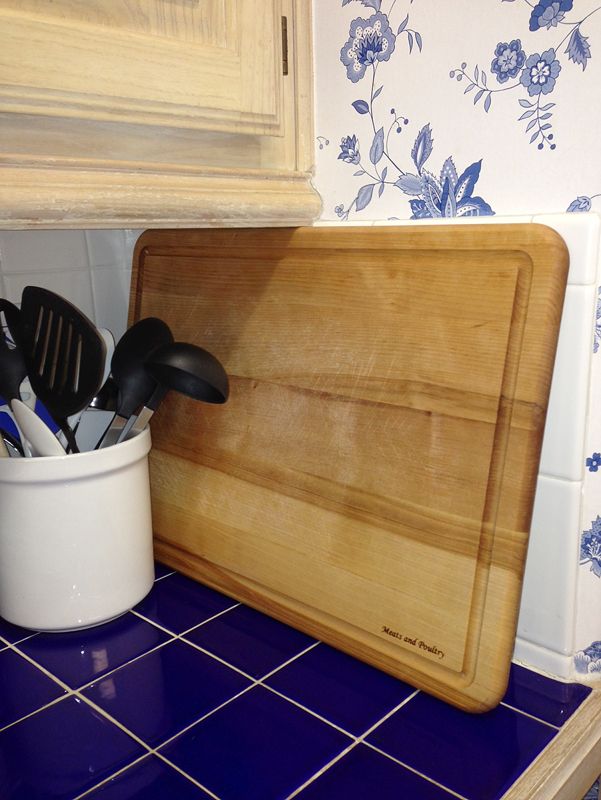
I am a hot water & soap kind of girl & almost everything I have & own gets washed that way, including my cutting board. By doing so, I know it's nice & clean. I do not put it in the dishwasher - I hand wash it. If over time the board begins to wear, I buy a new one. Easy peasy. I always stand my cutting board up to dry. After I wash it, I stand it up & lean it against my faucet in the sink. This board is on the large size, so it's a booger to wash, but I can still stand it up to dry. Forgot to take that photo - oops.

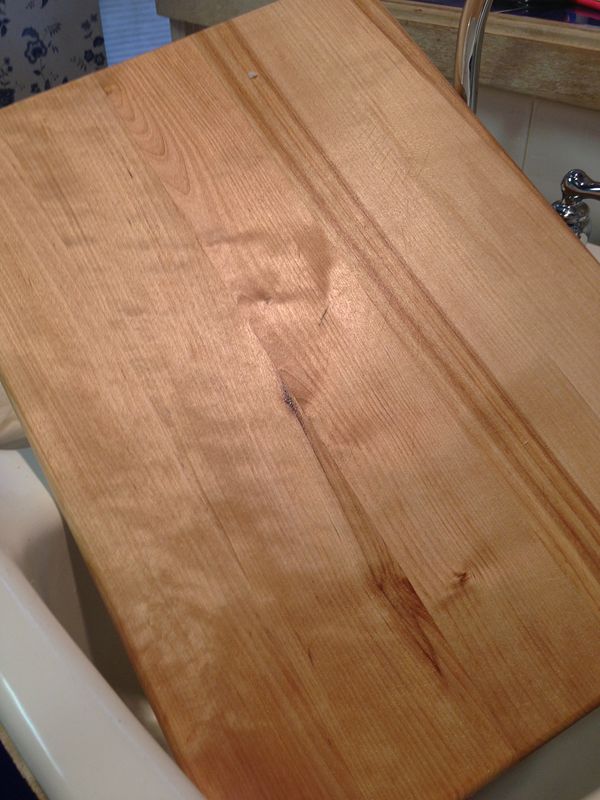
Here's my board, after completing all above steps! I treat my board about every 6 weeks, sooner if need be. My cutting board looks like this all the time! Nice & moisturized & pretty!


Happy lubing! Heehee. :)

Join my NEW link party, Bloghibition, every Wednesday evening!

Follow me on Facebook! Click here!

Linking up with: Uncommon Designs, Huckleberry Love, Home stories A to Z, Between Naps on the Porch, A Bowl Full of Lemons, Not Just a Housewife

Thursday, June 20, 2013

Homemade "Ranch" dip.

This is soooooo good! This is not my recipe. You can find the original recipe here.

I made a few modifications. Takes about 10 minutes to make.

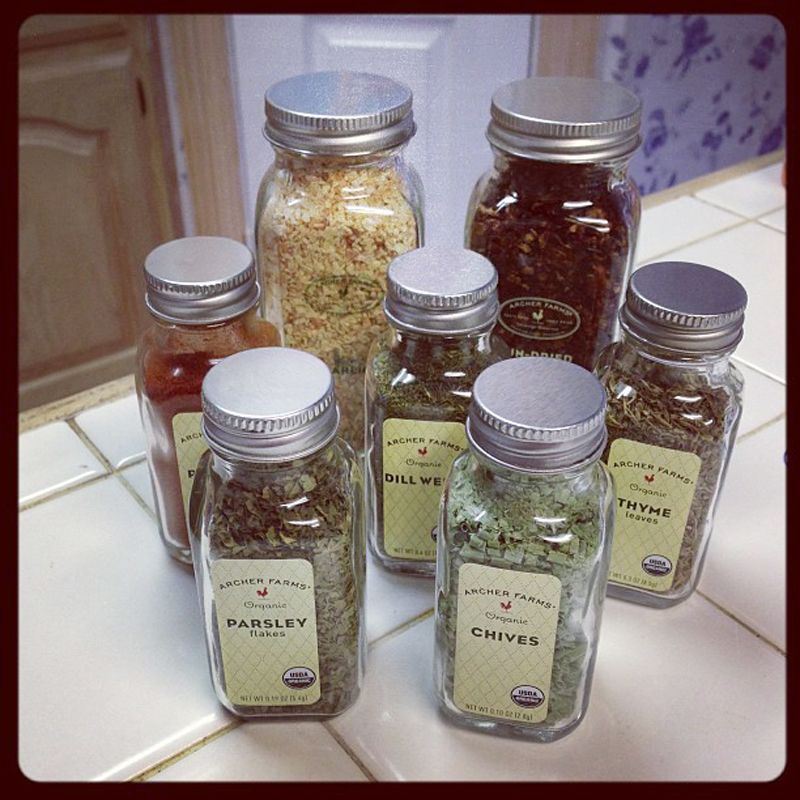
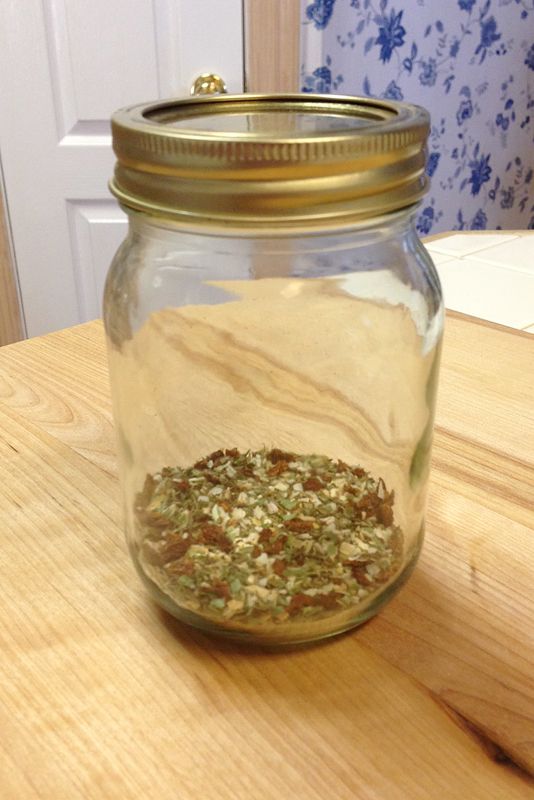
Ingredients for Ranch seasoning:

1 teaspoon dehydrated garlic
2 teaspoons dehydrated onion
2 teaspoons dehydrated sun-dried tomatoes, finely diced
1 teaspoon paprika
2 teaspoons dried thyme
2 teaspoons dried dill
2 teaspoons dried chives
2 teaspoons dried parsley
1 teaspoon black pepper
Kosher or seal salt to taste (I use Celtic Salt)

Add all ingredients to a small bowl & stir to mix. Store in a glass jar with lid, away from light & dampness. Use seasoning in dips & dressings.

*I doubled the seasoning recipe so I would have more. I sure am glad I did! I think I need to triple it!


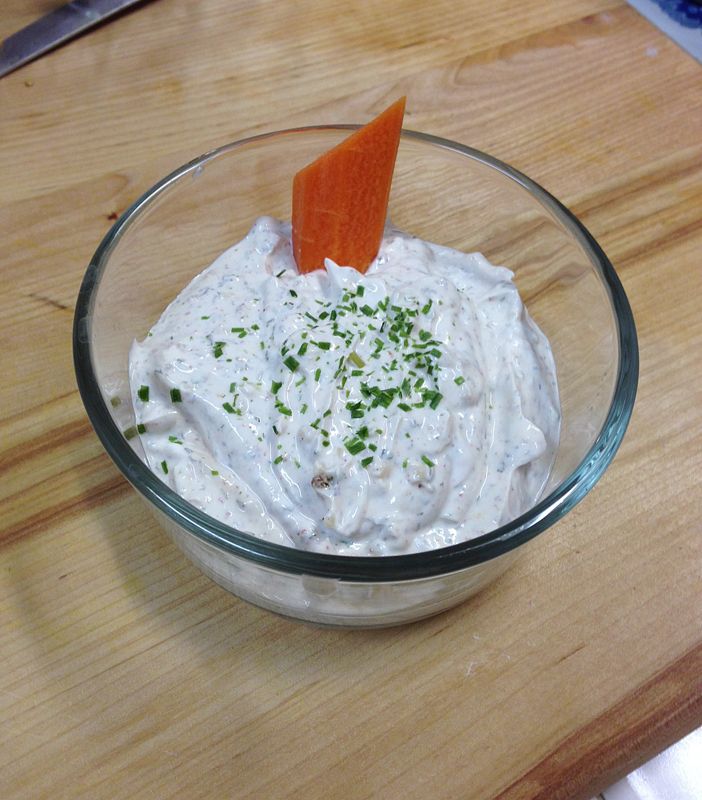
Ranch dip recipe:

1 cup Greek Yogurt, plain, fat-free
1/2 cup reduced fat sour cream, optional Greek Yogurt
1 tablespoon Ranch seasoning

Combine ingredients in a medium bowl, store in an airtight container in the frig. Allow dip to set overnight in the frig before serving.

*I do not use low-fat or fat-free anything. Ever. So I used just plain sour cream. After I mixed it all together, it didn't seem to pack much of a punch. So I added another tablespoon of the seasoning.


It is wonderful! After it sits in the frig, it gets even thicker & the seasonings & flavors mix further, making the flavor more intense. If you don't like really strong flavors, I recommend using just the 1 tablespoon to start.

In our opinion, it does not taste like Ranch. I think it has it's own unique taste & my husband thinks it favors Peppercorn Ranch. It's different. It's bold. It's a welcomed change in our home! I already need to make another batch.

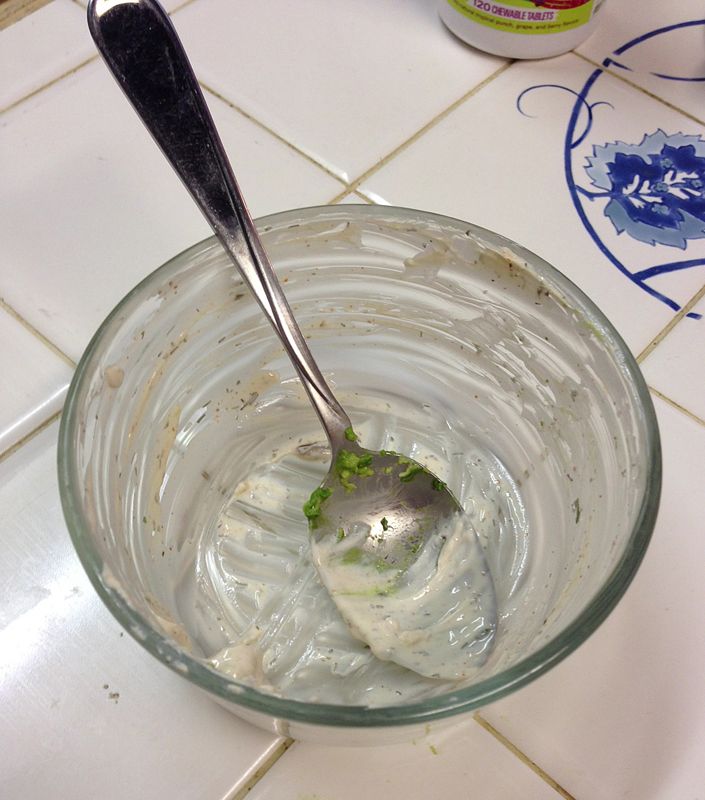
This is what the bowl looks like less than 48 hours after I made it. We used it to dip, to spread on sandwiches & in salads. I may add a little milk next time to make it less thick/more creamy.


(Pardon the avocado on the spoon. I added avocado to my salad. Yum.)

I will never purchase bottled dressings again. If we desire something different, I will google & find a homemade recipe. I am really starting to enjoy making our own foods. Did you just pass out? LOL :)

Linking up with Chic on a Shoestring Decorating, Shabby Nest, House of Rose, House of Hepworths

Thursday, April 11, 2013

My 'beefy-mac'.

Dani Johnson says it's crazy to go grocery shopping when you have food sitting in your pantry. Eat the food you have! Ok, then. I'm giving this a go. Tonight I pulled out a pound of hamburger meat & a box of whole-grain shell noodles. Now. What to do with it?


Tada! It was so simple & my kids, honest to pete, devoured it! It's hearty & inexpensive, too! Maybe $12-13? #winning!

Ingredients:

1 lb. hamburger meat
1 13 oz. box of whole-grain pasta shells
1 can undrained Rotel (I use mild for my kids)
8 oz. (2 cups) mild cheddar cheese, shredded
milk

Cook the pasta in one pot while cooking the hamburger meat in another. When meat is done, add Rotel. Simmer. Drain pasta & then add meat/Rotel. Pour in milk (I did not measure, but I added quite a bit for creaminess - maybe 3/4 of a cup or so) & add cheese a little at a time until well blended. Salt & pepper to taste.

Makes enough to feed 5 people! With some left over.

I'm sure there are a million variations you could use, but this is what I came up with on short notice. And I'll be doing it again. :)

Follow me on Facebook for more fun stuff! Click here!

Wednesday, March 27, 2013

Homemade buttered popcorn!

Rid the store bought 'buttered' popcorn & make your own! It is so simple, less expensive & tastes so fresh!

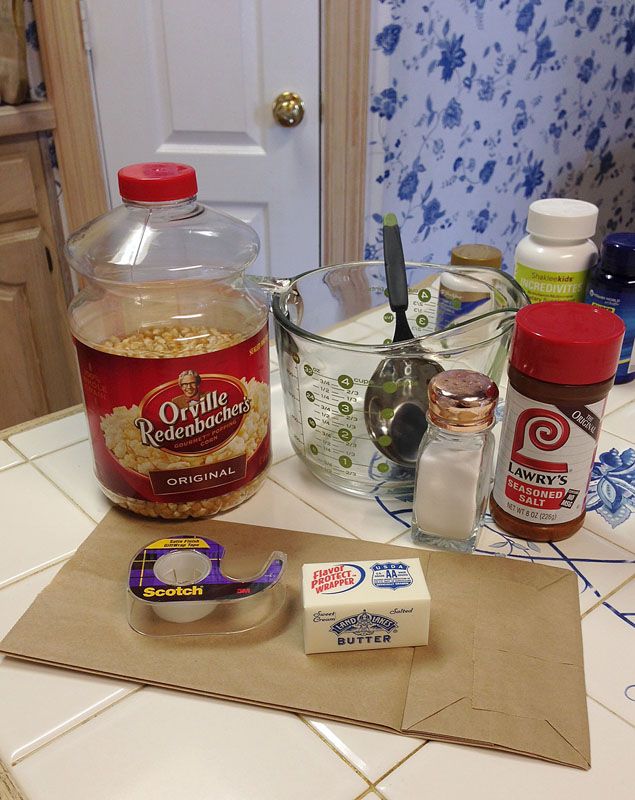
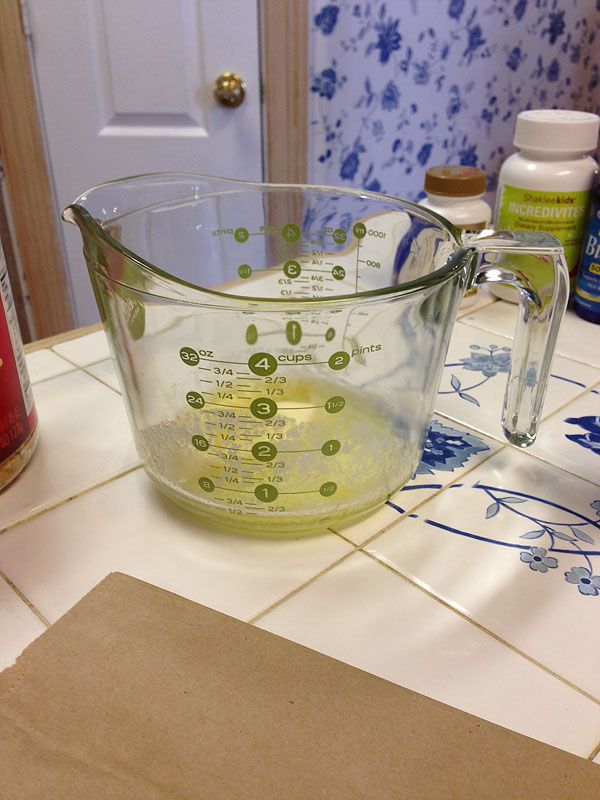
Here are the ingredients I use to make a large bowl of popcorn:

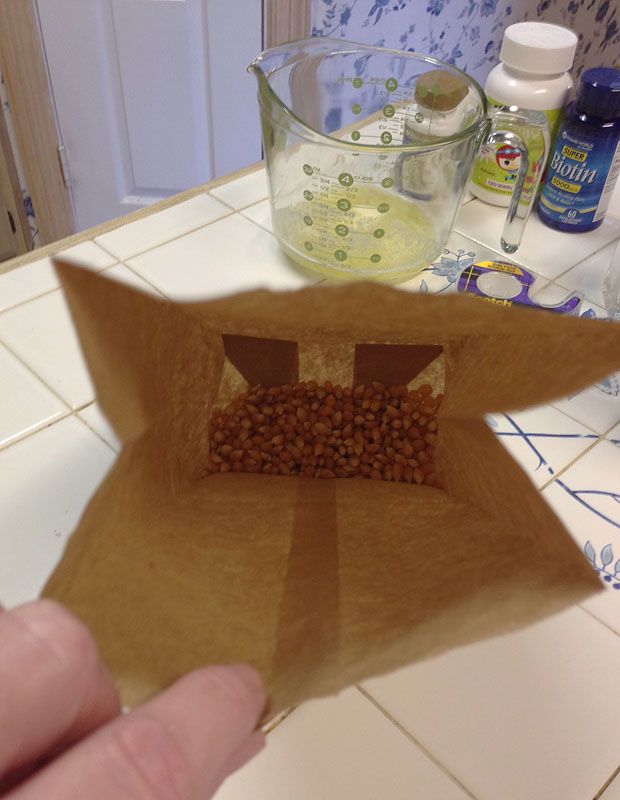
Popcorn kernels
Butter (not margarine! Quit eating that fake stuff! Real butter, in moderation, is a healthy fat!)
Salt (I'm switching to Celtic Salt as soon as I can find it!)
Lawry's


Melt 4 tblsp. butter in microwave for about a minute or so (I do not use all the butter - I should cut my stick to 2 or 3 tblsp.)


Pour about 1/3 cup kernels in bag.


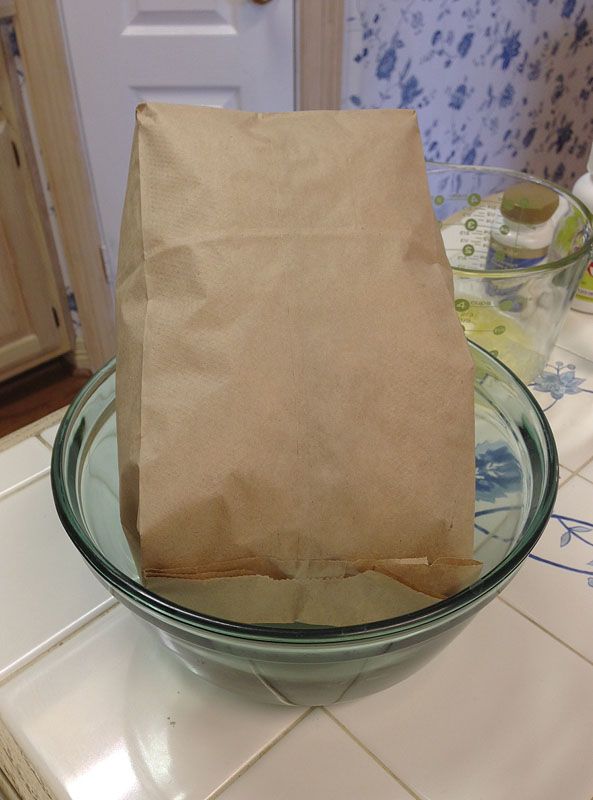
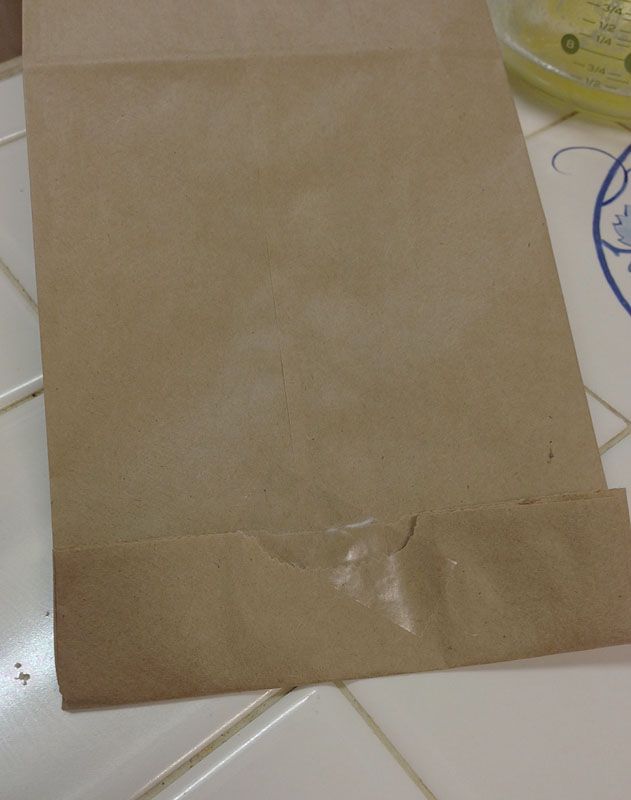
Fold it over & tape it closed. If you don't, popcorn will pop right out of it! I set my microwave for 3 minutes, but typically stop before that. When popping begins to cease, I shut it off promptly to avoid scorched popcorn!


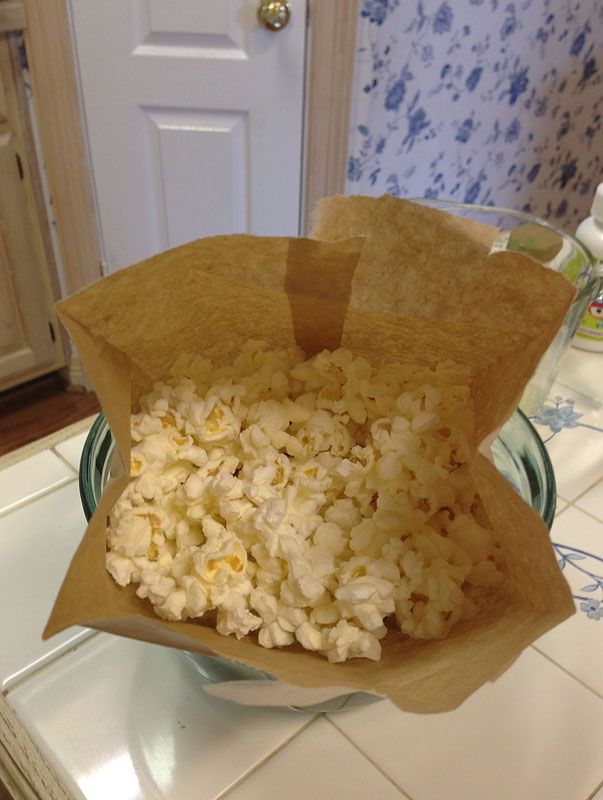
Here it is popped, but contained!


Tada! Nom nom.


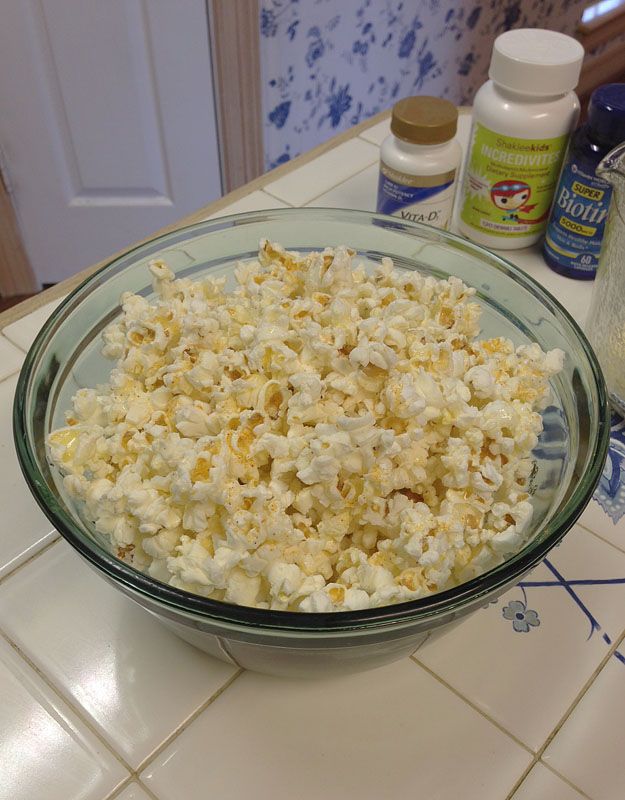
I layer mine - pour 1/2 bag of popcorn in bowl, dribble some butter over it & sprinkle with salt & Lawry's. Add remaining popcorn & repeat. Doesn't it look so fresh? None of that fake, orange 'butter' oil all over it!


Yummy!

Happy popping!

Tuesday, March 19, 2013

Scrambled eggs with veggies recipe!

I've made this for a while now - it's a recipe I just put together one day. Everyone gobbles it up, so I thought I'd post the recipe!

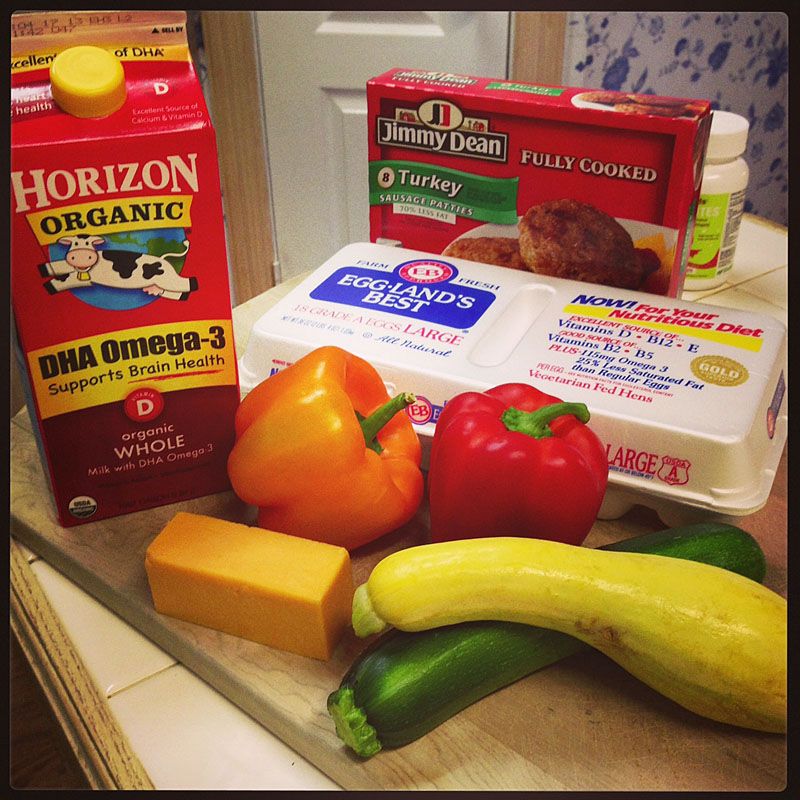
These are the ingredients I used today (you can add/delete/change veggies to your liking, tonight I forgot to add onion!) -

Eggs
Milk
1 - zucchini
1 - yellow squash
1 - red bell pepper
1 - orange bell pepper
Turkey Sausage (precooked)
Cheddar Cheese
Salt, Pepper, Lawry's (left out of photo)
Butter (not margarine! get rid of that stuff! left this out of photo, too)

I always use Lawry's on my eggs - any & every style! It adds so much flavor!


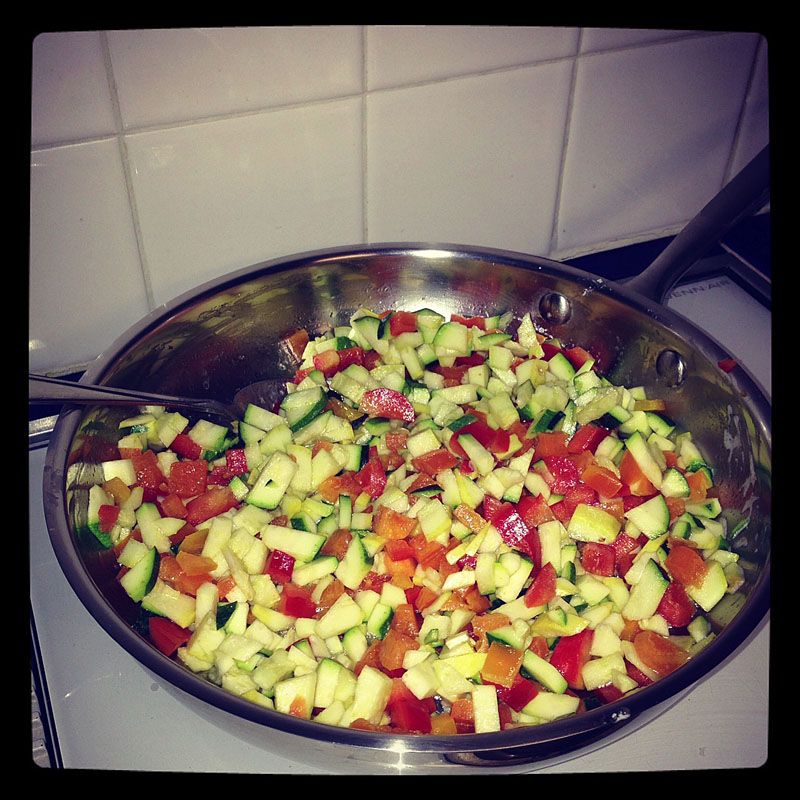
Wash & chop all the veggies (I only used about 3/4 of each vegetable, because it makes so much!), then saute them in just enough butter to cover the bottom of the pan.


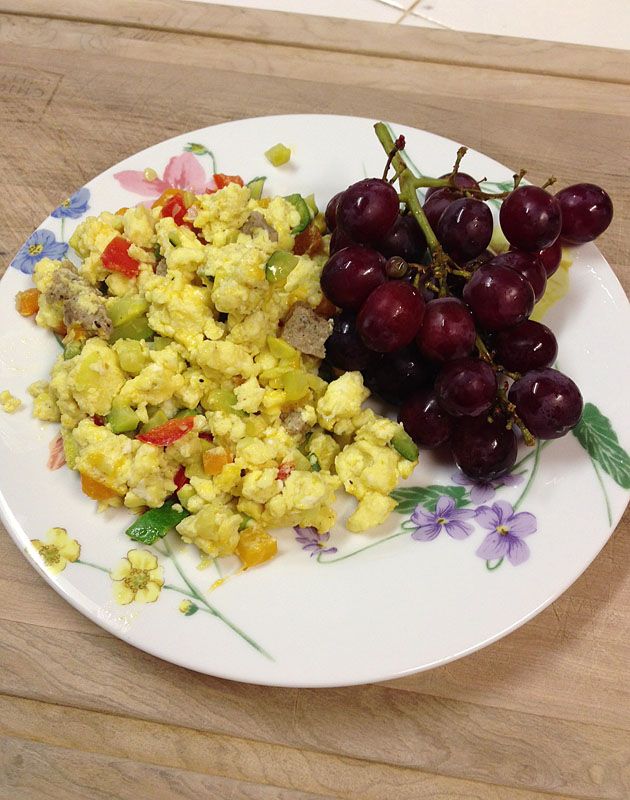
In the meantime, in a large bowl, scramble a dozen eggs (obviously, you can use less), with a dash of milk (the more milk, the fluffier!), & when the veggies are soft, toss in the eggs. I need a much bigger pan! While that's cooking (sorry, didn't think to photograph every step, but next time I will!), heat up 4 little rounds of sausage & cut into bite size pieces. Right before the eggs are done, add the sausage, salt, pepper & Lawry's & complete cooking. My final step, when the eggs are done, is to grate some cheese & mix it in! Tada! That's it!


My husband worked late tonight, so I made it easy for the kids. They ate theirs with grapes. Sometimes, we have toast. Every now & then, I roll them in tortillas & add some salsa!

YUM!

(This is also a great way to sneak in some veggies - because of all the flavors, I seldom have to nag my kids about eating their veggies!)

Friday, March 8, 2013

Some healthy lunches you can pack in advance!


Today’s post is a special guest post from Jenny Baptiste, an independent blogger who offers insightful, wonderful tips on living healthy!  Below, she is featuring healthy lunches (great for kids!), that are perfect for packing the night before.  Check out her blog, easyhealthfitness, for more valuable information regarding living healthy!


In my experience the key to a successful packed lunch is making it the night before. I would rather make lunch at 8pm than try and assemble something while my mind is foggy at 8am. Who doesn’t love making the morning routine easier? If you have multiple lunches to pack, then this rule is even more important! With that in mind the simple recipes below will taste just as good after a night in the fridge as they would the same day…

School Lunch

Minestrone Soup and a Breadstick

Most soups are simple to grab and go but minestrone is one of the healthiest choices around. It is also incredibly easy to make! I usually use this Betty Crocker recipe and go really heavy on the vegetables for an extra filling dish. The great thing about minestrone is how flexible it is - if your kids can’t stand mushrooms just swap them out for green beans instead. Minestrone is sure to please kids of all ages! This recipe makes about 12 servings and stays fresh a long time so you can eat it all week. Pair the soup with your favorite bread sticks (either homemade or store bought) and you’ve got a healthy and delicious meal.

Quesadillas and an Apple

What kid doesn’t love quesadillas? Add cheddar cheese and deli ham (sneak some spinach in if you can) to your favorite tortilla. I like corn tortillas because they are a healthier option than flour. Heat in a skillet until golden brown and then slice into wedges for your lunch box. Thrown in an apple to round the whole thing out and voila – another simple healthy lunch.

Granola Yogurt and Fruit Salad

When I was a kid I thought strawberry yogurt was a special dessert. Wow did my mom have me fooled. Today I still enjoy yogurt and hopefully your kids do too! Pick your favorite yogurt and granola. You can mix it together beforehand or let them mix it at school. Chop up your favorite fruits for a fruit salad that can eaten separately or added to the yogurt mix if you’re feeling adventurous.

Hearty Chili

This chili recipe is to die for. I’ve been making it for years and received only the best feedback. For a healthier spin try substituting the ground beef for ground turkey. Honestly I think this chili is a one course meal but if you feel like being supermom add a piece of cornbread. A word of caution on the cornbread - pay attention to the ingredients if you use a mix. Today’s corn bread has so many additives and sugars it is more like corn cake. Try making it from scratch or just use some bread you know and trust. This chili only gets better with time. After a night in the fridge the flavors have a chance to mingle and it tastes even better!

Jenny Baptiste is a Colorado blogger exploring how little changes make for a healthier life. Checkout her blog Easy Health and Fitness at for healthy recipes, health tips, and product reviews. Follow @EasyHealthBlog for all the latest posts!

Thank you Jenny!

Saturday, March 2, 2013

Busy week & breakfast burritos!

It has been one busy week!  Let's see here.  Besides the normal, daily routine consisting of - breakfast, school lunches, school, work, cleaning, errands, laundry, homework, dinner, showers & bed, this week we threw in -

Major colds for a few of us which knocked us (me, included) out for a few days...

Salt dough made for a school project... (that was really cool & fun to make!)

A special band party for my oldest because he is excelling in band...

Dance practice...

School open house for my elementary kids... (band party/dance/open house all on the same night)

Husband working extra hours...

Dentist appointments for all 4 of my children...

Working on & wrapping up a product review for a large, internet company...

Guest post that I will be doing on Monday...

Whew!  I hate when my blogging gets put on the back burner but sometimes, that's just life. Reality happens. :)

So.

Not only am I so honored to have the privilege to guest post on another blog, but I'll be featuring a guest post here on my blog, too!  Both of these are a first for me! So exciting! The guest post I will be featuring on my blog is amazing, so be sure to check back, especially if you have children!  Fun stuff!

I will have my product review post completed this week, too!  If you wear glasses or have a family member who does, do not miss this post!  It will be up this week! Love, love, love!

And then add what I already have scheduled -

What grossness I found in my washing machine... (I'm kind of stalling on that one)

Blah, blah, blah.

I need more time! Don't we all need more time?

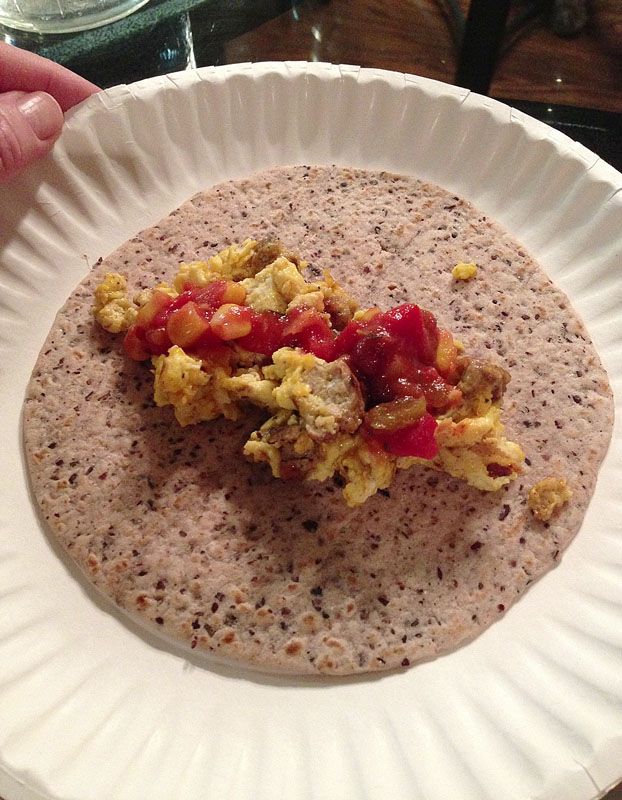
In the meantime, here's a super simple 'breakfast' burrito recipe my husband whipped up for us tonight:


(Yes, that is a paper plate. No, we haven't used all of them yet. No, I won't be purchasing any more after this!)

Yummy!

Eggs with milk (we use only Egg-Land's Best eggs & organic milk)

Turkey Sausage

Wheat & Black Bean tortillas

Salsa (we used corn/black bean/roasted pepper salsa)

That's it! Scramble it up, put the salsa on top & roll in a warm tortilla.

So good & so quick!

Happy weekend!

Friday, January 25, 2013

Butter or margarine?

I watched a video last week claiming that margarine is one of the top 5 foods we shouldn't consume. So, in my quest to have my family eat healthier, I began to wonder, butter or magazine? I asked that on my FB page one day, after finding conflicting information that left me quite confused. Someone sent me this article that is featured on Snopes.com. Who knew Snopes included foods?

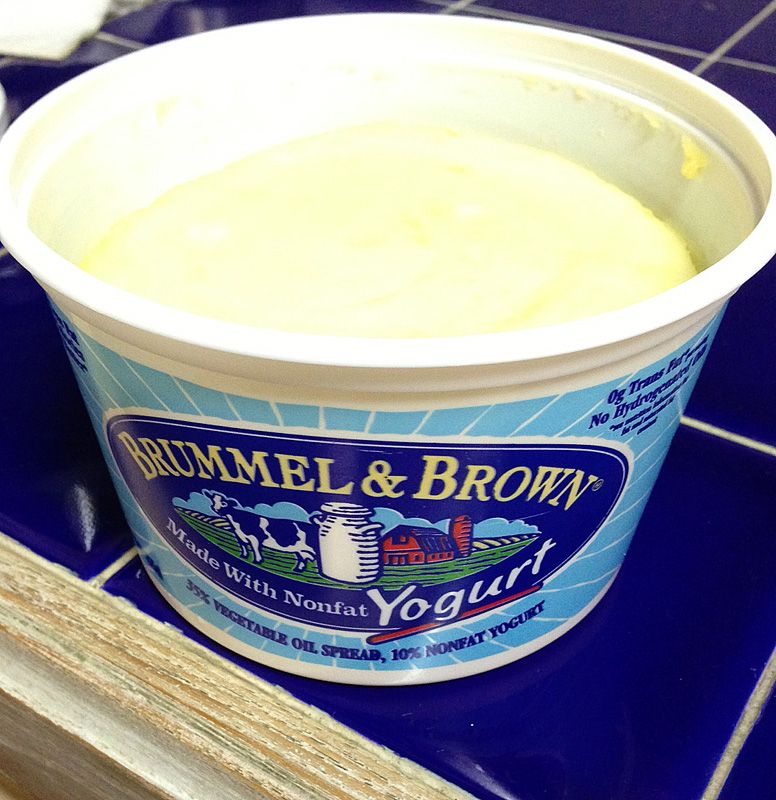
We have always eaten margarine. Why? I don't know. Truth be told, I guess just habit. I've bought it for so many years, I don't even think about it. I used Country Crock (check out the ingredients - holy cow!!) for years & then switched around a bit. Most recently, Brummel & Brown. Never read the label, never had a reason to, never even considered it.

(This image is after I left it sitting on the counter for 4 or so days - I left it out intentionally to see what it did. Not much - looks the same, maybe a tad brighter, & has a very slight margarine scent. Tonight I trashed it.)


After making the decision to switch to real butter, I did just a little more research. I googled, only to discover we shouldn't eat real butter because of the saturated fat content. That we should eat margarine, because it contains vegetable oil which is better for cholesterol levels, but then I read we need to stay away from vegetable oil. Huh?

More research & suggestions from friends...

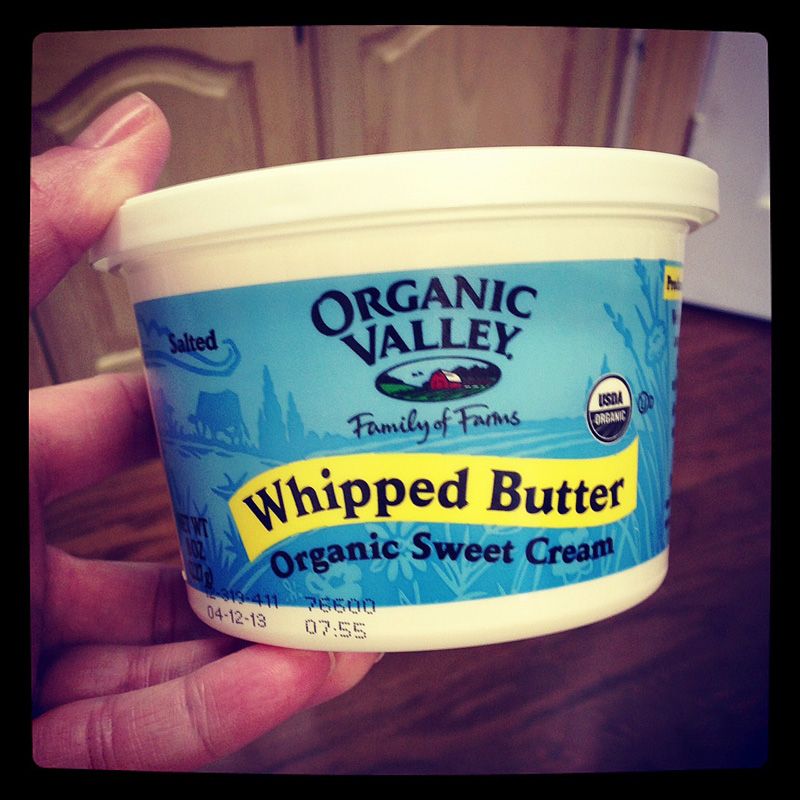
The winner? Butter!


1.) Ingredients: cream & salt. Two ingredients!

2.) Healthy!

3.) It is an acceptable 'good' fat to eat!

4.) Can help lower cholesterol!

5.) The taste. Flavor. YUM!

Do some googling. You'll find lots of yummy information regarding real butter! And it's so good, we went through our first tub in 5 days! Ha!

Just another product I wish I would have changed years ago! Make the switch!